Kid’s Art Keepsake Albums

I’m an artist. My brothers are artists. My dad is an artist. So it comes as no surprise that my son, Tanner, is quite the artist himself. {Breckin is still a little young to determine his aptitude for it.}

What comes with being an artist are supplies…lots of them. I’ve found a way to corral most of that {psst – see yesterday’s post!} but today is about what comes from those supplies – the artwork. The piles and piles…and piles…of artwork.

Don’t get me wrong, I LOOOOOOVE that my son is creative, loves to express himself through art…and has a bit of his mommy’s side in him. It’s something we can do together and both really enjoy. I love teaching him techniques and encouraging him to think outside the box. But alas, at the end of the day, I just realistically don’t have the space to keep all of his original works.

I keep the “keepers” in his storage box that I created last year to have a place to put all the special works he does here and at school, but that will fill fast, and ideally, I’d like for it to cover all his years through high school graduation {if that’s not possible, maybe two boxes at most}. I also like to hang my absolute favorites in frames and display them in our play room/home office.

Well, I’ve found the solution.

artwork keepsake albums

The image above is via an online print gallery for artwork albums called Plum Print.

I am in love with this idea. I think it would be great to create one for each age or school year. You can even personalize the binding so that it’s easy to see from the bookshelf when you’re grabbing to reminisce.

Slider 1 
How great would this be? Your kids would love to pull them out when family or guests come over so they can proudly parade their artwork without a pile of papers to sort through. You could even make them as gifts for the grandparents.
These ones at Plum Print are a tad on the pricey end, starting at $85 for 30 pieces of artwork in a 10″x8″ book, but the quality is great and they do offer a 40% discount on duplicates of books you’ve already printed.
Another alternative for this project would be Shutterfly. A bit less expensive, and they often offer discounts on their photo books. They offer many sizes and cover options to fit within your budget.
Soft Cover Photo Books
So what are you waiting for? Corral that pile of keepsake artwork together and create a book you can enjoy for years to come!

Find me and follow on Facebook, Twitter & Instagram 
Add my RSS Feed to your Reader

Kid’s Organized Art Area

Let me tell you how happy I am to finally be posting this! This means I have finally gotten my act together and created a clean and organized space for my children to create in! It has been on my to-do list for a long time now. I’ve gone through all sorts of different storage options for their supplies and I think I’ve finally landed on something I am happy with and so excited to share with all of you.

I found the white table and stool at Target. The white table is normally $49.99, but I got it on sale for $39.99. I had eyed it for a couple of months and happened to walk by it again one day when I saw the sale, so I had to grab it up. I am now kicking myself because I should have grabbed two…I do have enough space next to it for another one. I think I’ll be getting another one. The stool was $11.99.

The bar and buckets are from IKEA. I knew I wanted 3, one for markers, one for crayons and one for colored pencils. The bar was $2.99, each bucket was $3.99, the “S” hooks were $1.99 for a set of 10, and the wire basket was $3.99. The wire basket is used to hold their stickers. I used Martha Stewart chalkboard labels.

For the wall holding their papers and books, I used some wire racks that I found at TJ Maxx and/or Marshalls {I have a few of these around the house and I’ve gotten them from both places}. They were $14.99 each.

I used a white paint marker from Hobby Lobby to label them. The paint is washable with rubbing alcohol should I ever want to write anything different. The printable you see above the racks is one I designed myself – and a quote I made up myself:

I wanted the area to be a positive space for them while they create. I think it will make them feel good to read all of the signs. Tanner is the only one that can read them right now!

The other wall has two bulletin boards by Board Dudes that I had already. They were from Target. I thought it would be great for them to be able to pin up their favorite works of art. And the rest of the wall is filled with more positive printables!

Here is one happy boy using the art area:

So there you have it – our finished art area for the kiddos!

Verdict: They love it!

Here is a full view again:

What do you think? Please remember to pin it if you love it! xoxo

Find me and follow on Facebook, Twitter & Instagram 
Add my RSS Feed to your Reader

*You can view the parties I link up to here.* Also linking at www.savvysouthernstyle.net

Closet Turned Pretty Pantry

I can’t even begin to tell you how this has been such a long time coming…we were in such dire need of a decent-size pantry. We’d been using one set of kitchen cabinets up to this point.

Our house is a little strange…no pantry, not a lot of kitchen cabinet storage…and this little in-betweener closet {Is it a coat closet? Supply closet? Pantry?} It just wasn’t really in ideal condition to serve as any of those options…and I definitely tried my hand at all of them in the space. Almost five years later, this is what it was looking like:

Yep, one ugly catch-all concealed by a door. Not really serving the purpose it could be. I made the decision that I finally wanted to have Jake custom-build it out into a pantry.

First we started with removing those standard wire shelves. Jake went to his workshop and built a set of shelves and a couple of floating shelves. He then installed them and primed and painted them white. I also wanted to add some subtle color to the walls, so we went with the “Sublime” green paint we had originally used on our kitchen walls {though those are being repainted gray soon}.

As far as containers, I mostly used what I had around the house, and those blue ones are from the dollar store. And I’ve been slowly building my fresh food container collection. I already had those labeled with chalkboard labels in our cabinet pantry.

I created some labels for the bins.

And here she is in all her glory! It’s such a nice change.

Eventually I plan on turning the back of the door into our menu planning central…post to come on that. And the wall to the right will  be used to hang our broom, mop, etc.

So what do you think? Please remember to “pin” it if you love it! xoxo

Update 3.25.13 – I’ve been asked as a guest on I’m Topsy Turvy’s Closet Organization link-up for March…this is the post being featured.

Members of the Point of View:
Stephanie from Crafting in the Rain
Leanne from Organize and Decorate Everything
Amy from Ameroonie Designs
Jonie from Just between Friends
Ashlee from I’m Topsy Turvy
 
point-of-view
point-of-view

Find me and follow on Facebook, Twitter & Instagram 
Add my RSS Feed to your Reader

*View the parties I link up to here. Also, new parties I have found to link up to this week are:

Bathroom Vanity Cabinet Storage

I totally took a cue from Cassie’s post yesterday and got my butt in gear on working to resolve our bathroom storage issue. We have a very small bathroom upstairs that serves as our master bathroom, but unfortunately it is the only bathroom up there, so we share it with the boys. OK, OK, might as well call it a community bathroom.

Anywho, it has a standard-size {read: small} vanity cabinet that doesn’t even have drawers that really pull out. It has those fake ones that are just for looks. Other than this cabinet, the only storage we have is the linen closet, but that’s pretty full with towels and my crazy amount of lotions and products {this will be my next organization project in here}. As you can see from this next picture, Jake and I really need a space that allows for easy and convenient access when we get ready in the morning, while allowing our counters to be clear when not in use. You can see we were not properly utilizing the storage space:

Pretty pathetic, huh? Poor Jake was only working with that tiny black basket to store his essentials.

Well, so off to Target and the Dollar Store I went. I found these small containers at the dollar store. They ended up being the perfect size for the drawers I would find at my next stop, Target.

I also found this basket that I ended up using for my curler set. I don’t use this set too much, but this basket will make it easy to grab out of the cabinet and keeps the clips corralled with it.

And here are the contents of the drawers {I got so lucky that these drawers fit perfectly around the plumbing pipes}. The black and clear drawer on top of mine holds all of my mani/pedi supplies for easy grab-and-go access, since I like to do them in the living room while watching TV after the boys go to bed.

I wanted to add the extra special touch of labeling the drawers and I remembered that I still had some of my Martha Stewart file cabinet labels leftover from my desk organization project.

Unfortunately, I only had two of them, not three, so I decided to just label the drawers for Jake and me and figured the toilet paper drawer would be fine without.
 

So there you have it, my organized bathroom cabinet storage. I am so excited about it…this will prevent clutter on our countertop and allow more space in the linen closet for other things.

So what do you think?

Find me and follow on Facebook, Twitter & Instagram 
Add my RSS Feed to your Reader

Family Binder {A Chore Schedule}

One of my resolutions this year was to develop a cleaning schedule for our household. Well, I finally got around to it!

Here it is:

If you would like a personalized one of your own, please let me know!

This is the official kick-off to my Family Binder…I plan on finally getting this done this year! More templates to come.

Find me and follow on Facebook, Twitter & Instagram 
Add my RSS Feed to your Reader

Stylish & Tidy Cord Storage

Some of you may know, I used to have a blog called [just had] A Bright Idea where I focused mostly on interior design & decor and some DIY-ing. When I started Style Oyster, I wanted to incorporate those things along with my love of fashion and all things, well, stylish. Unfortunately, leaving that blog for a new url posed it’s challenges. I lost the readers I had acccumulated over the 6 months of having the blog as well as the content…but wait, that content is NOT lost! Thanks to Blogger, I was able to move it over to Style Oyster. However, it was a little outdated (the wording in some, etc.) and of course the pictures were all tagged with my JHABI logo (and a few with even older blog logos than that! I had some name change issues…) I am putting this paragraph here as a preface to these posts because even though they are from the past, they are still projects that took a long time and are dear to my heart and I didn’t want to lose them when I officially take my old blog off the Internet. So I apologize to those of you who have followed me since [just had] A Bright Idea, as you will be experiencing some deja vu, but I know some of you are new and this may all be new content to you. So bear with me, I plan on posting these once a week until they are all on Style Oyster. Thank you so much, and I do hope you enjoy. xoxo

—————————————————————————————————————————————-

I love gadgets. And computers. And anything that requires electricity to work.

Therefore, I have lots and lots…and LOTS of cords. And those lots of cords were kind of all over the place. In desk drawers, on counters, still plugged into outlets….you get the gist.

Time to intervene and get rid of the tangled mess. Time to ORGANIZE.

Here is my new storage solution for my cords…

First, I found some great cord ties with labels in the Martha Stewart collection that recently hit Staples stores:

Then, I went to wrappin’ and labelin’ cords:

And I had this great storage box from Wal-Mart ($5.00) that came equipped with a separator…perfect for separating the cords by type. I also used my Dymo labeler to label the sections. And VOILA! Here is the finished project:

This tucks away nicely in my guest room closet. Of course it has a lid too!

How do you store your cords?

Find me and follow on Facebook, Twitter & Instagram 
Add my RSS Feed to your Reader

Art Box {from Tiffany’s}

Sort of. I found this big Tiffany & Co. box at Goodwill for $0.99 {nothing inside it, boo}. But I love me some “Tiffany Blue” and it works perfectly with my desk decor {teal blues and pink}…so I thought, “What the heck, it will make a nice storage box.”

It fit JUST perfectly into one of my desk cubbies {hallelujah!}. I pondered over what I should store in it…then I remembered that I had my paints in a smaller storage box, with some not able to stand straight up due to height. The Tiffany’s box was just tall enough that all of them could fit in it standing, so I deemed it the better storage solution of the two and that was the end of the story. I could always use that other box for something else, no doubt.

I thought it was missing a little something when I remembered that I still had some leftover file box labels from the Martha Stewart collection at Staples. Popped one on, labeled it and here it is:

{Maybe one day I will receive a Tiffany’s box with something in it…xoxo.}

Find me and follow on Facebook, Twitter & Instagram 
Add my RSS Feed to your Reader

Stylish & Compact Workout DVD Storage

Some of you may know, I used to have a blog called [just had] A Bright Idea where I focused mostly on interior design & decor and some DIY-ing. When I started Style Oyster, I wanted to incorporate those things along with my love of fashion and all things, well, stylish. Unfortunately, leaving that blog for a new url posed it’s challenges. I lost the readers I had acccumulated over the 6 months of having the blog as well as the content…but wait, that content is NOT lost! Thanks to Blogger, I was able to move it over to Style Oyster. However, it was a little outdated (the wording in some, etc.) and of course the pictures were all tagged with my JHABI logo (and a few with even older blog logos than that! I had some name change issues…) I am putting this paragraph here as a preface to these posts because even though they are from the past, they are still projects that took a long time and are dear to my heart and I didn’t want to lose them when I officially take my old blog off the Internet. So I apologize to those of you who have followed me since [just had] A Bright Idea, as you will be experiencing some deja vu, but I know some of you are new and this may all be new content to you. So bear with me, I plan on posting these once a week until they are all on Style Oyster. Thank you so much, and I do hope you enjoy. xoxo

—————————————————————————————————————————————-

 I think it would be safe to say that I own about every fitness DVD put out in the last 10 years:

And quite frankly, I’m attached to the little buggers. But I’m not in love with the amount of space they take up. (I could utilize this drawer for so many other things I currently have “floating” around my house.)

Time for another solution.

I found this cute storage box at Wal-mart for $5.00 made for compact CD/DVD storage. (And it’s PINK…perfect!):

I also already had some jewel disc cases in different colors. I decided to try and keep the workout programs separately organized by color of jewel case, i.e. Insanity in pink, P90X in purple, etc…

I kept what pamphlets I needed from the workout programs and tossed anything else.

Once I put them in the box, I realized the separate jewel case colors sort of got lost in the mix – it was hard to differentiate between the colors to quickly grab-n-go with what DVD I needed:

So I pulled out some of my Avery 5366 file folder labels and put them on the jewel case spines:

I then colored the spines with various highlighters to separate each workout program/series:

I still thought it looked a little unfinished, so I went the extra mile and pulled out my label maker:

Now my DVDs look like this:

I put them back in the box…and thought, nope, still hard to know which color is which DVD! So I hopped onto my computer and made a key to paste on the top inside of the box. Now this is what it looks like – all finished:

And since our workout space is also our office space, this little box will have a home on my new desk! I love how the storage this desk provides can help unify the space even though it is utilized for a few different activities.

Thanks for reading! What are your bright ideas for DVD/CD storage?

Find me and follow on Facebook, Twitter & Instagram 
Add my RSS Feed to your Reader

Wall Organization System

Some of you may know, I used to have a blog called [just had] A Bright Idea where I focused mostly on interior design & decor and some DIY-ing. When I started Style Oyster, I wanted to incorporate those things along with my love of fashion and all things, well, stylish. Unfortunately, leaving that blog for a new url posed it’s challenges. I lost the readers I had acccumulated over the 6 months of having the blog as well as the content…but wait, that content is NOT lost! Thanks to Blogger, I was able to move it over to Style Oyster. However, it was a little outdated (the wording in some, etc.) and of course the pictures were all tagged with my JHABI logo (and a few with even older blog logos than that! I had some name change issues…) I am putting this paragraph here as a preface to these posts because even though they are from the past, they are still projects that took a long time and are dear to my heart and I didn’t want to lose them when I officially take my old blog off the Internet. So I apologize to those of you who have followed me since [just had] A Bright Idea, as you will be experiencing some deja vu, but I know some of you are new and this may all be new content to you. So bear with me, I plan on posting these once a week until they are all on Style Oyster. Thank you so much, and I do hope you enjoy. xoxo

—————————————————————————————————————————————-

It’s back! My wall organization system! I had it in the kitchen originally, but it didn’t look like it does now. I had actually taken it down and hung the boards in the office/guest room, but since there is limited traffic in there, the message posting became useless and I didn’t update the calendar as I should have been. It was much better utilized in our kitchen…the central hub of our lives. So I put it back…but better!

I picked up a little black wire magazine/letter wall file at TJ Maxx for $14.99 – knowing it would be perfect for corraling all of Tanner and Breckin’s art projects/schoolwork each week until I got around to storing it in their schoolwork file boxes (which I try to do once a week). There are even places to put labels with their names (plan on getting that done here soon).

I already had all the boards from before. They are all from Target, made by Board Dudes. They have the Pottery Barn look without the Pottery Barn price.

I made this sign on the computer in order to fill a blank spot above the black wire files:

I also was so excited to find the perfect place the hang our family pictures! I had to take them down from the mantle once we got our flat screen TV a couple months ago.

I even added a menu organizing area on the side of the refrigerator next to the organization wall. I got the calendar and file system from Target. The grocery shopping list pad is from Walmart.

I’m so glad to have it back where I know it will all be utilized. It makes me smile every time I see it! Do you have a wall organization system? I’d love to see it! Post a link in a comment below!

School Paperwork Solution!

Some of you may know, I used to have a blog called [just had] A Bright Idea where I focused mostly on interior design & decor and some DIY-ing. When I started Style Oyster, I wanted to incorporate those things along with my love of fashion and all things, well, stylish. Unfortunately, leaving that blog for a new url posed it’s challenges. I lost the readers I had acccumulated over the 6 months of having the blog as well as the content…but wait, that content is NOT lost! Thanks to Blogger, I was able to move it over to Style Oyster. However, it was a little outdated (the wording in some, etc.) and of course the pictures were all tagged with my JHABI logo (and a few with even older blog logos than that! I had some name change issues…) I am putting this paragraph here as a preface to these posts because even though they are from the past, they are still projects that took a long time and are dear to my heart and I didn’t want to lose them when I officially take my old blog off the Internet. So I apologize to those of you who have followed me since [just had] A Bright Idea, as you will be experiencing some deja vu, but I know some of you are new and this may all be new content to you. So bear with me, I plan on posting these once a week until they are all on Style Oyster. Thank you so much, and I do hope you enjoy. xoxo

—————————————————————————————————————————————-

If you’re like me and you have a child that brings home endless amounts of papers each day from school, then you might also be like me in that you have random piles of it all over (neatly stacked, at least!) I can’t believe the amount of worksheets, drawings, etc that come home with him.

I read a very cute blog everyday called IHeart Organizing – some of you I’m sure have heard of it. Anyway, the blogger, Jen, is excellent at organizing and always finds cute, stylish ways to do it. I came across a post of hers earlier this week where she showed what she does with all three of her boys’ schoolwork that she wants to keep.

They each have their own file box sectioned off by grade – in each folder she files her favorites of their artwork, crafts, tests, report cards, etc. Unfortunately, it would be too hard to keep it all, but this solution definitely helps to be able to hang on to more of it for cherishing later in life. Each folder had a paper with a picture of the child from that year and their teacher’s name, etc. Jen even offers the same printables she used for her own on her website. I snagged hers up, but edited them with fonts and details that were more “me”. Thanks, Jen for your awesome website and sharing your ideas with the world. You are helping to make my life so much easier!

Here is how my project turned out – I did one each for Tanner and Breckin! It will be so fun to look back through these with my husband and the boys as the years go by.

First, I got 2 blue plastic file boxes ($7.97 each at Walmart):

I figured plastic would stand the test of time, and the handle makes it easy to tote around when pulling it out

I stuck a personalized label on the front of each box:

I got some manila folders and file hangers (already had both of these) and I printed out these covers & labels for the folders:

And here are some pictures of the finished project:

You can see I pulled out my stash of kept projects from Tanner’s daycare and Pre-K years

I just LOVE it.

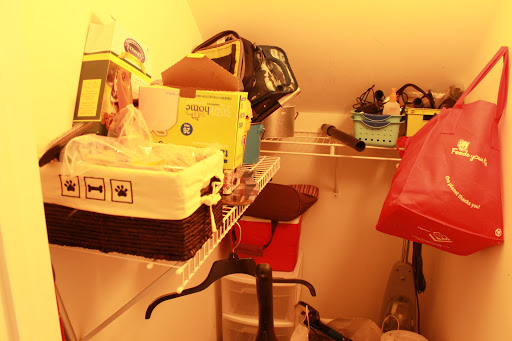
I figured this top compartment would be a great place for ribbons, medals, etc…

I am so glad I have somewhere to immediately stick Tanner’s schoolwork and Breckin’s daycare projects each day. I will definitely keep those loose piles to a minimum now!

How do you tackle the school papers? Would something like this help you?