DIY Monogram Art

This was a pretty easy project that didn’t cost a lot at all.

Supplies Needed:
Frame {Mine were a total of $4.00}
Fabric sized to fit picture in frame {About $7.00 per 1/2 yd cut}
Wooden Letter of Choice {I got mine at Hobby Lobby for $1.75 each, regularly $3.49}
Spray Paint for Frame {Optional – I had on hand from other projects}
Spray Paint for Letter {Had on hand from other projects}
Fabric Stapler {Had on hand}
Craft Glue {Had on hand}

Total Cost per Monogram Art {for me, considering I already had some supplies on hand}: $10.75

When I was at Goodwill a while back, I found two identical frames with some very old-fashioned art in them that I knew would be perfect to make some statement art with for the boys’ rooms. At $2.00 each, they were a great deal, their overall size being approx 18″ x 22″.
 

The art pulled out rather easily, just bending a few staples. They were actually cardboard-like, so I used them to put my fabric on.

I laid out the picture backward on the fabric so it wouldn’t show through the fabric on the front. I made sure it laid evenly and then pulled back the fabric tight and secured in place with my fabric stapler.

{Please don’t mind my hairy carpet, the remnants of Siberian Husky are hard to get rid of…with time it will happen, lol.}

To paint the letters, I used this paint:

I didn’t have to prime them before. As you can see, the red was a paint and primer in one. I lightly sprayed two coats on each, letting dry between coats. I then let them each sit for an hour before applying to the fabric.

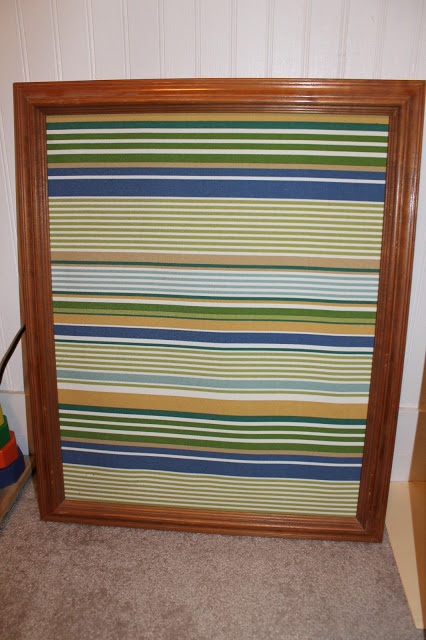
This is a picture of the fabric I used for Breckin {I won’t be showing his final piece because I am working on his wall gallery and will reveal all then!}

For Tanner’s frame, since I chose to paint his white, I used one coat each of these:

After the frame was dry and the letter was set with craft glue onto the fabric, I put it all back together and this is what I got! It was exactly the look I was going for with Tanner’s monogram.

What do you think? Please “pin” it if you love it! xoxo

To view the parties I link up to, click here. And also these that I found this week:

Home Stories A2Z

Find me and follow on Facebook, Twitter & Instagram 
Add my RSS Feed to your Reader

Kitchen Progress Update

Goodness gosh, I think I have been holding you off too long on the kitchen update post since we finished painting the cabinets! They have been done since like the beginning of December! Guess that’s what the holidays will do to you.

But anyway, as promised, here you go.

I must say hubby did some hard work and got these babies done very quickly…considering he had to still go to work from 8-4:30 every day. Total time started on a Sunday and the cabinets were hung back in place on the following Thursday evening. He then purchased the hardware, made some drill holes where needed and they were officially finished that Friday or Saturday. Not bad when you factor in the time for sanding and for each coat of primer and paint to dry between coats. {I actually primed them for him while he sanded the base of the cabinets. So again, I helped!}

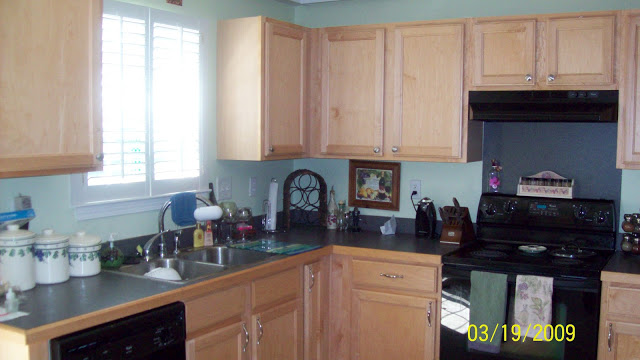
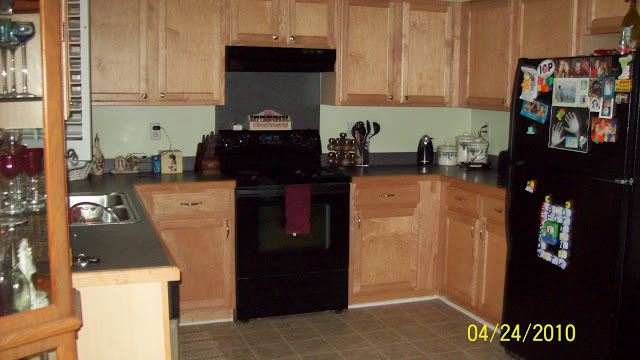
Now let’s look at the before/after shots:


 I am so happy with the change. The kitchen feels so much more up to date and a lot brighter. It’s not the largest space, but I definitely enjoy my time in there much more than I used to. The colors give a crisp, clean feel – which is just what I want to feel while in the kitchen.

There are still a few things to be done yet, but here is our progress list so far {click links for corresponding posts}:

1. New Under-Mount Sink
2. Granite Countertops
3. Backsplash
4. Paint Cabinetry {White}
5, Install New Floors
6. Wall Organization System
7. Paint Walls {Light Grey}
8. New Dining Table & Chairs
9. Curtains for Back Door

So what do you think so far?

Find me and follow on Facebook, Twitter & Instagram 
Add my RSS Feed to your Reader

Bulletin Board Revamp

For months now, I’ve had revamping Tanner’s bulletin board on my to-do list. It’s been sitting in my garage for quite some time now, leaving a very large, bare spot above his desk. I finally got around to doing it thanks to some time off from work for the Christmas holiday.
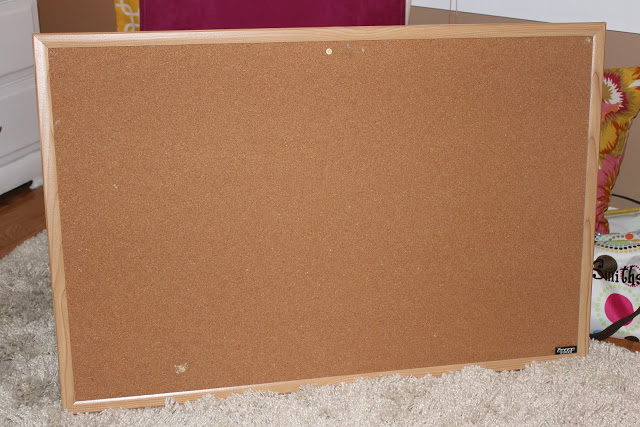
Here’s how it started out – just your run-of-the-mill plain Jane bulletin board:
I went to Hobby Lobby and purchased a yard of fabric and some decorative nailhead trim:
 I laid out the fabric over the board and started putting in the tacks one by one right along the edge of the frame. {Warning: This will hurt your good thumb after a while!}
After I finished that, I turned the board over and using a light-duty fabric stapler, I tightly pulled the fabric and stapled in place.

And here is the final product:

Total cost of this project:

Bulletin Board: Had already {You can purchase a similar one for around $10.00.}
1 Yard of Fabric {Hobby Lobby}: $8.99
5 Boxes of Nailhead Trim/Tacks {Hobby Lobby}: $10.00

$18.99 – Not too bad for a custom decorative bulletin board!

So that’s one more thing crossed off my to-do list for Tanner’s room. I’m still planning on repainting the walls very soon – I think that will be the next thing I do. I should have a finished room to reveal to you not too long from now!

Find me and follow on Facebook, Twitter & Instagram 
Add my RSS Feed to your Reader

A Little Love & A Lot of Yellow

You get two posts today, you lucky ducks, you!

So let’s start this post off bright and happy…

I can’t think of any other way to do that other than to show you my favorite Craigslist score to date:

Oh-Em-Gee, right? I was on Craigslist lurking around for fun DIY candidates when I stumbled upon the post that held this beauty. A Crate & Barrel yellow lacquered table being sold for 25% of the original price. It was a little steeper than I wanted to pay for a Craigslist console table, but it was so perfect for my space {both color and measurements}, I wouldn’t have to do a thing to it and it was in excellent condition…so I didn’t even bother haggling. I just wanted it to be mine.

And mine she is. God is good. {Well, God is way better to me than just perfect bright yellow console tables, but you get the gist.}

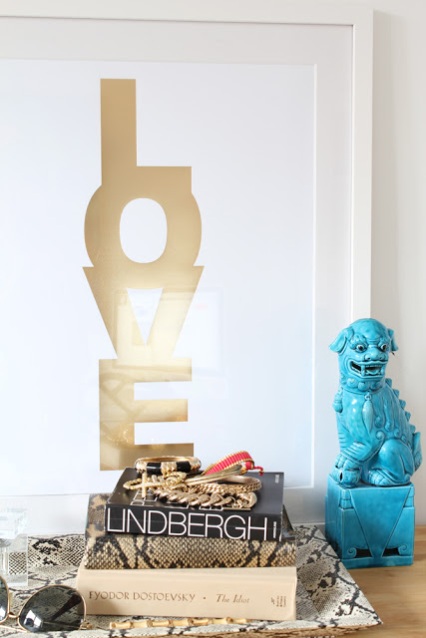
I’ll be showing you how I styled her in just a hot second…but I first want to show you something I created just for the table. I’m sure many of you have seen and admired the lovely work of Jen Ramos of Made By Girl. I had been teetering and tottering over purchasing this piece from her online store the last couple of weeks:

via

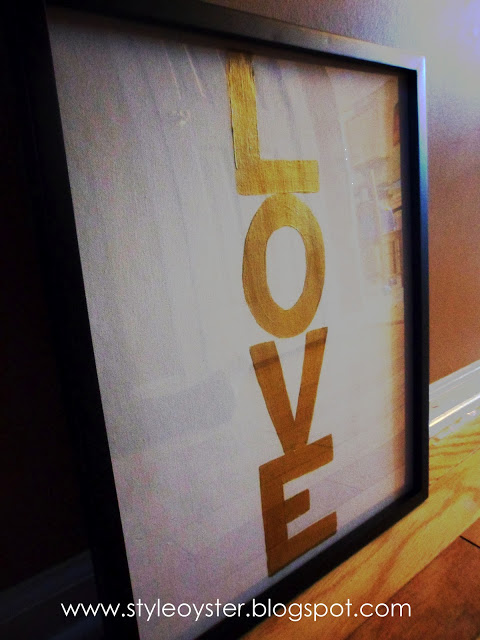
After careful decision, I decided I actually wanted something painted on canvas, so I recreated the print myself using gold metallic acrylic paint. I purchased a 16×20 frame for $14.99 from Target and voila:

{I highly recommend you check out Jen’s shop, especially if you are not the DIY type. I just happen to love making art myself, so when I see something I love and am able to do, I DIY it rather than buy it. She’s got some great stuff though, and great ideas…I would have definitely purchased this print if I couldn’t have painted it; it’s not a bad price either.}

And here this LOVE-ly painting is on my beautiful yellow console table…styled up and pretty.

{This is not permanent styling – just threw some quick things together for now, and that top mirror key rack will be gone as soon as I finish my DIY project for what is going in that spot! Can’t wait to show you…}

So what do you think of the new piece? {Or rather, both of them!}

I’ll be coming back very soon with an update post showing you my living room befores/afters…there are still some things in progress, but I am so happy with how far it’s come since earlier this year when I started to brighten things up. Stay tuned…xoxo.

Find me and follow on Facebook, Twitter & Instagram 
Add my RSS Feed to your Reader

Playroom / Home Office Wall Art

A long while ago, hubby found six of these pictures of trains up in our attic – must have been randomly left there from previous house owners. At the time, he had suggested hanging them in Tanner’s room {Breckin was but a sparkle in our eyes back then} and I declined because Tanner has the surf/beach theme going on and trains simply would not go. Because the matte in the frames was made of colored rattan, I thought they were kind of beachy and maybe I could do something else in place of the trains that would go with the theme of his room.

Well, long story short, I never got around to that. They’ve been sitting around being moved from closet to closet ever since.

Now that we are putting together the home office/play room/workout area, I thought they would be great to personalize and put on the walls. I bought two cans of spray paint, one of each of our accent colors, pink and teal. I decided to spray the rattan those colors.

The yellow was for something else…

But first, I of course primed them.

The rattan took 2-3 good coats of spray paint, drying about an hour in between coats. It pretty much sucked up the first coat and I wanted to make sure it had a thick even finish, not spotty.

Since the neutral tones in the room will be black, white and gray, I decided to paint the frames white {they were originally black, and I had already painted them white long ago when I thought I was doing something with them.} And the small frame around the center picture would be painted black.

It took me a little while to decide what I wanted in those small center squares. I figured they had so much color already with the rattan, I wanted to keep the center pictures black and white. I wanted it to be classy, yet playful to fit the overall purpose of the room. So —–

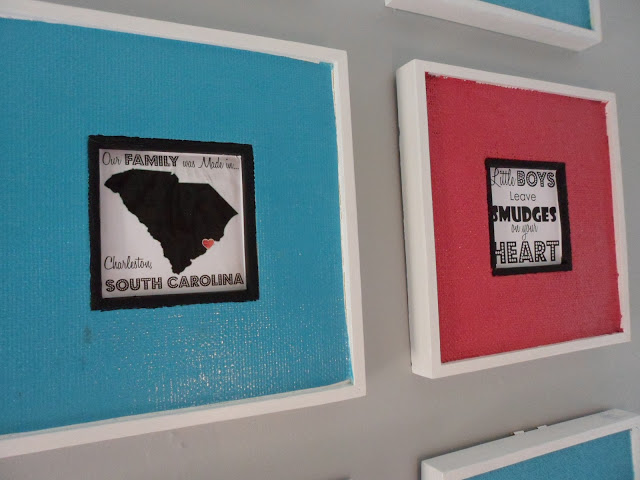
Black handprints of the boys! Perfect! {Plus, they had fun getting to be a part of Mommy’s project and I think they like seeing a part of themselves in the room – Tanner at least, Breckin is a little too young to understand!}

Those middle prints are ones I made on the computer and cut to size. The one on the left has the shape of the state of SC and says “Our Family was made in Charleston, SC.” And the one on the right says “Little Boys Leave Smudges On Your Heart” – I thought that one was fitting for a group of handprint pictures!

I’m really happy with how this room is turning out…it’s a total creative outlet room {art studio/office/play/exercise room!} and I wanted the style of it to reflect that. I get to take more risks in this room and play around with it more.

A Drink For The Lady?

I am so eager to get started on this garage-sale-stand-turned-bar-cart project I mentioned in a post last week. I have so much inspiration that I simply haven’t been able to 100% decide which direction I want to go in – color, etc. Do I want to go bright and vivid, vintage glam, or play it safe? {I think I can take Option 3 out of there, I never like to play it safe with fun DIY projects!}

Let’s look at what I’m working with again:

I know she’s not pretty right now…and I think I’m pretty sure I don’t want to keep her black {though it does match my current dining table, however, I plan on changing up that table and chairs soon anyway…but that’s another story for another day.}

I’ve already resolved that I’ll need a piece of glass to fit the top…another option I’ve thought of is a mirrored top, but not sure I want to cover the geometric design of the top, it sort of gives it a little character. I want the glass or mirror to stick out a couple inches from each side. I would also love to find a way to get casters on the legs so it will actually be a cart rather than just a bar.

Here are the gorgeous bar carts that I’ve been eyeing for inspiration:

via

The more I think about it, I’m leaning toward gold. It would play off the new yellow tones I’ve added to my home as well as be a bit glam…but we’ll see.

via
But a bright color looks fun too…


via

Can’t wait to get started on it and show you the final project!

Find me and follow on Facebook, Twitter & Instagram 
Add my RSS Feed to your Reader

Weekend {Meet Our Newest Family Members}

This weekend had an early start – a 5am run on Saturday (had to do it before hubby left for USCG duty!) and then I got my boys up and ready to hit a few yard sales. I was hoping to find some great furniture to DIY into something spectacular, but I had no such luck. The yard sales were pretty barren…not a lot to offer. I suppose it’s hit or miss typically. However, I did manage to get a great deal on some blank canvases! I got seven 8x10s and one 16×20 for a total of $5.00. Not too shabby at all.

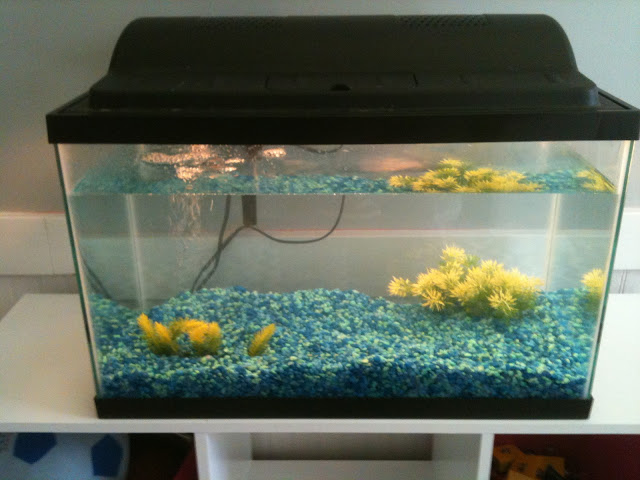
The one big find we did come across was a used 20-gal fish tank with a brand new filter included. It was in great shape. Over the last few weeks, I had actually been thinking about getting a fish tank for the boys, but was hesitant due to the start up costs. But I got this set-up for $20.00:

This is of course after I scrubbed it down with soapy water and Windex’d all the glass inside and out. All we had to do was go buy a few starter fish and some food. {Tanner and Breckin were so excited to pick out fish, it was so cute.}

Here’s Tanner – Feeding his new pet fish for the first time:

Their names are Mellow Yellow, Firefly & Sugarplum. {I’ll let you guess which is which.}

We plan on adding more to the family in a couple weeks…the pet store employee recommended starting with no more than three and introducing more in a couple weeks.

The previous owners gave me this stand with the aquarium:

But I’ve chosen not to use it with it…I’m actually envisioning some sort of makeshift bar cart…just needs a little TLC {Maybe a couple coats of spray paint in a bright, fun color? I’m loving the ones at Society Social right now – if you haven’t checked out their most recent Magalog yet, you simply must}:

via

…and I’m also thinking I could get a piece of glass for the top to have a flat surface…anyway we shall see what it ends up as.

I recently discovered {via Pinterest} my new favorite go-to website for healthy meal planning – Skinny Taste. The recipes look simply scrumptious and I tried out one this weekend {and we have more planned for the week}. Saturday we had Grilled Chicken with Spinach & Mozzarella. 

via

It turned out sooooo good {any time the hubby approves of a super-healthy dish, it’s a winner}. Here’s a picture of mine:

Our Sunday started off with another Skinny Taste recipe – PB+J Yogurt. When I was skimming the site the other day, I saw this and knew the boys would eat it right up…and that they did. Plus, the ingredients are ones we keep in the house all the time and it’s easy to make. I substituted almonds for the peanuts though.

via

Then we had a lazy morning of playing out in the backyard {Daddy built this fort for the boys}:

I managed to get to Target for some essentials {aren’t all things at Target essential?} and clean house a little bit during Breckin’s nap. We had a big thunderstorm roll in, so our original pool plans got foiled.

Daddy came home from USCG duty and we had a nice {and healthy} meal that I found in All You‘s latest issue…Black Bean, Corn & Shrimp Salad. It was as good as it looks.

via

After the boys went to bed, Jake and I settled in with a couple glasses of wine to relax before getting back to the grind.

How was your weekend?

Find me and follow on Facebook, Twitter & Instagram 
Add my RSS Feed to your Reader

My DIY: Secretary Desk Rejuvenation

Some of you may know, I used to have a blog called [just had] A Bright Idea where I focused mostly on interior design & decor and some DIY-ing. When I started Style Oyster, I wanted to incorporate those things along with my love of fashion and all things, well, stylish. Unfortunately, leaving that blog for a new url posed it’s challenges. I lost the readers I had acccumulated over the 6 months of having the blog as well as the content…but wait, that content is NOT lost! Thanks to Blogger, I was able to move it over to Style Oyster. However, it was a little outdated (the wording in some, etc.) and of course the pictures were all tagged with my JHABI logo (and a few with even older blog logos than that! I had some name change issues…) I am putting this paragraph here as a preface to these posts because even though they are from the past, they are still projects that took a long time and are dear to my heart and I didn’t want to lose them when I officially take my old blog off the Internet. So I apologize to those of you who have followed me since [just had] A Bright Idea, as you will be experiencing some deja vu, but I know some of you are new and this may all be new content to you. So bear with me, I plan on posting these once a week until they are all on Style Oyster. Thank you so much, and I do hope you enjoy. xoxo

—————————————————————————————————————————————-
I’ve been looking for the perfect secretary desk for. like. EVER.

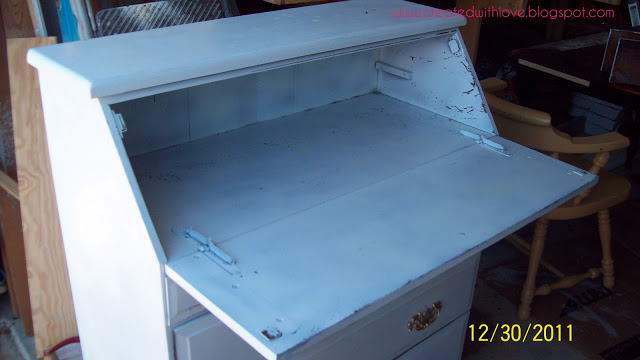
Last week, I found this one on Craigslist:

Isn’t she a beaut’? I know what you’re thinking….she could use a little TLC. Let’s just say the previous owner had no idea what she was doing when she painted it. The desk was obviously brown originally and she had spray-painted it white (a BIG furniture-painting no-no)…an absolute crappy job. She said she had been going for shabby chic – well, I think it was more shabby than chic.

Enter: ME.

I had the perfect vision of my secretary desk long before I bought this one. My desk had a stark white semi-glossy painted exterior with modern brushed nickel hardware. The inside cubby holes would perfectly fit my bill paying items & business products, i.e. calculator, checkbooks, business cards, etc.

Let me tell you step by step how I transformed this desk into a lovely piece anyone would be proud to own.

Step 1: I started by removing all of the hideous gold (and then spray-painted gold – yes spray-painted) old antique-y original hardware. I then took measurements of the holes to make sure I purchased hardware that would fit right into the holes.

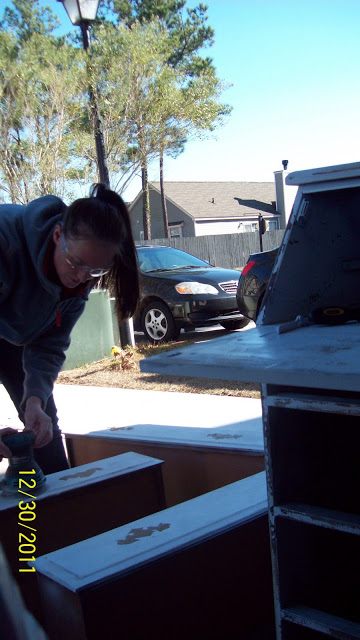
Step 2: I sanded down the entire desk and drawer faces with 100-grit sand paper to make sure the primer would have a good surface to stick to. Thankfully, my handy hubby is a carpenter by trade, and I have all the tools handy you could ever need, so I had power sander to get the job done quickly.

Step 3: After sanding, I dusted off all the surfaces and got the primer ready. I used a paint roller made for cabinet and door painting. I put on a nice, even coat of primer and let it dry for a couple hours.

Step 4: Once the primer had dried, I excitedly went about putting on my first coat of white paint. I used Olympic Premium Semi-Gloss paint in Ultra White from Lowe’s. I used the same type of paint roller for this step. I let the first coat dry overnight.

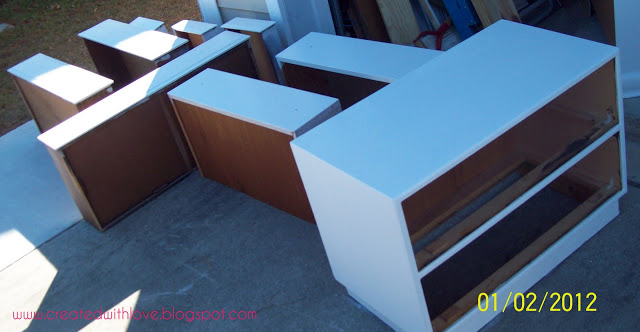
Step 5: I put on the second coat of white paint and let dry. For the cubbies, I thought it would be cute to use some of the same pink paint we had leftover from painting the walls in the room it was going in. I painted the outside of them white and then used the pink paint to carefully paint the insides with a foam brush. (That extra set of drawers and dresser you’re seeing is a small dresser that is also in the same room…it had a previous bad white paint job and old hardware as well, so I got knobs to match, sanded the whole thing down and painted it as well – two birds with one stone!)

Step 6: I installed the new drawer hardware that I purchased at Lowe’s. (One of the small drawers was a bit chipped off, but I didn’t worry about fixing it just yet, may get hubby to fashion something eventually.)

Step 7: I moved the desk to her new place home and started loading her up! (Imagine my excitement when I found out she fit JUST perfectly on the wall right between the window trim hubby had installed when we first moved in!We’re talking like a half-inch to spare. PERFECT.) Here she is, all finished:

DIY Art via Pinterest

I’ve said it before and I’ll say it again:

Pinterest rocks my world. That’s all.

If I need an idea, or am trying to figure out the best way to do something – be it fashion, interior design, decorating or whatever, well, I just head over to Pinterest and I usually am able to find exactly what I’m looking for…or maybe even what I never knew I totally loved. Pinterest is amaze-balls like that.

So anyway, to get on with the actual topic of this post: Art

We love it, we admire it, we gaze at it, we need it to decorate with…but not everyone can make it (or so they think).

Thanks to Pinterest, we have access to so many great DIY art ideas – stuff that is pretty easy, but looks fabulous. {No one would ever know you don’t have a creative bone in your body.}

I have been an artist since I could pick up a paintbrush, but I know not everyone is the same…and even I get a little artist’s block from time to time – so things like this help inspire and motivate me. Here are some of the best DIY artworks on Pinterest:

On Pinterest via

Talk about a perfect rainy-day art project for adults and kids alike. This would be a fun addition to a home office, craft or play room.

On Pinterest via

Believe it or not, this piece was made by strategically- placing tape to create a herringbone design and then splashing some paint over it in a whimsical fashion. Remove the tape when paint is dry and – VOILA! Art.

On Pinterest via

I’m a fan of Jen Ramos‘ artwork. These pieces in particular would be pretty easy to recreate for yourself. You could choose any colors you wish so that it goes perfectly with your decor. I love how they add a great pop of color – so simple, yet so fabulous.

On Pinterest via

I love the monochromatic scheme of these pieces, but you could even recreate your own unique version using complementary or a multitude of colors. Geometrics are all the rage right now, so why not take advantage of the simplicity in their creation?


On Pinterest via

Simply take a can of spray paint and some large leaves and have at it! I love how they did many of these in different colors and leaves and made a gallery. What a nice statement. And who doesn’t love a little nature?

Hopefully you feel inspired to create your own work of art for your space! Don’t forget to follow my Pinterest boards!